Introduction
These instructions describe how to deploy the DITO Template Manager application to a Kubernetes (k8s) environment.
iText DITO Template Manager consists of 4 main technical components/containers: frontend, backend, database, and editor application.
All deployments, services, persistent volume claims and config maps can be specified in a single deployment file to simplify its management. Preferred file format should be YAML because this format allows storing several documents in one file.
System Requirements
|
iText DITO System Requirements - Manager+Editor Application - Kubernetes flavor |
|---|
|
The minimum recommended system requirements to run 1 copy of the application are:
4Gb memory
Kubernetes version 1.20.0+ (for both the cluster and |
Prerequisites
You can install kubectl CLI from the official website.
If you have configured kubectl access to Kubernetes cluster, you can display a list of contexts using the following command:
kubectl config get-contexts
and switch the current context using the command:
kubectl config use-context <context_name>
Configuring Kubernetes context
Kubernetes context needs to be configured before proceeding with further deployment steps. The configuration is specific to the Kubernetes engine you are using. Please consult with your Kubernetes provider or use the configuration from one of our deployment examples.
Create Kubernetes Cluster
Kubernetes clusters on cloud providers can be automatically created and configured using Terraform infrastructure files. Alternatively, you can use a local cluster with minikube.
To use Terraform infrastructure files download and install Terraform CLI from the official website.
Please note that using Terraform is completely optional and you can use an existing cluster or set it up manually. Please consult our deployment examples for Terraform configuration files for specific providers.
Deploying the application using helper script
For your convenience there is a helper script that automatically pulls the necessary images from Docker Hub and deploys iText DITO Manager and Editor.
Download the deployment helper script and save it in an otherwise empty folder.
How to Use the Helper Script
Prerequisites
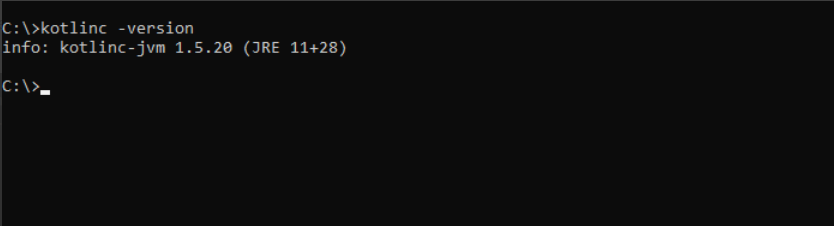
The helper deployment script requires Kotlin version 1.4 or higher to run. Installation instructions can be obtained from the official website. You can verify your Kotlin compiler installation with kotlinc -version command that should print the version of Kotlin that is installed.
Download the Script
The script can be downloaded from the dito-deployment-scripts repository at iText Artifactory. You need to download the script version matching the version of the application that you want to roll out or update to. E.g., if you want to deploy DITO version x.y.z, you have to download the script with version x.y.z. If you want to update your application from version a.b.c to version x.y.z, you have to download version x.y.z of the deployment script. Save the downloaded script in an otherwise empty folder.
Application Directory
The deployment script requires a dedicated (and initially empty) folder to operate. Put your script into this folder. During execution of some of the operations, the script will create files needed to run the application (application files, config files, backup files, temp files) in this directory. The directory needs to be writable.
List of Available Commands and Their Parameters
To view available commands provided by the script and their parameters, call kotlinc -script deploy-kubernetes-x.y.z.main.kts -- help and follow further help instructions.
Run the Helper Script to Deploy the Application
When the correct version of the script is stored into a folder and you have the correct version of Kotlin, you can run the script from the command line. In the first step, the script will create a deployment file, a config file and will then deploy the application. Navigate to the folder where your script has been saved and enter the command: kotlinc -script deploy-kubernetes-x.y.z.main.kts -- create-app-file --help
Create Deployment File
In the first step you create a Template Manager application deployment file.
kotlinc -script deploy-kubernetes-x.y.z.main.kts -- create-app-file
You can set values for several parameters in the script or update the deployment file after it has been created. These parameters include the port where the application will run and the namespace where the application will be deployed. By default the application will be deployed on port 80. Namespace is the mechanism to separate groups of services, deployments and configurations from others. You will be able to see an overview of the available parameters by adding --help to the command.
Also, you can use --scn/--storage-class-name parameter to specify which persistent volumes should be used during deployment. Note, that not every storage class name is supported in specific Kubernetes installation.
For an Azure Kubernetes cluster it is recommend to use the managed-premium storage class. Other storage classes could prevent the application database from starting.
Create an Environment Configuration File
In the second step, you create an environment configuration file (env.yaml). In the command to create this file you can pass parameters to set a username and password for the global administrator of the Manager application, and the deployment namespace also. Enter these values between double quotes:
kotlinc -script deploy-kubernetes-x.y.z.main.kts -- create-config-file --admin-email=admin@email.com --admin-password=your_password --namespace=namespace
Once the environment configuration file has been created, you can update parameters in the file or rerun the create-config-file command.
Deploy the Application
With all the parameters set, you can now run the deploy command to deploy the application.
kotlinc -script deploy-kubernetes-x.y.z.main.kts -- deploy
The process of application deployment may take a while. The Kubernetes engine will pull the necessary Docker images for the Manager frontend, backend, database as well as the Editor image.
Connecting iText DITO SDK instances to Manager
Configure License
Your SDK instance must have a valid license configured. You can obtain a license from iText or an iText DITO implementation/reseller partner.
You can pass the license file into SDK deployment via a Kubernetes config map.
Enable templateDeploymentFeature
An important additional requirement is to enable the templateDeploymentFeature in your SDK instance. This is done via a user config file that is passed to the SDK. Create such an entry in the config map for your SDK/API container and call it user.config.yml.
pdfProducerReportCache:
  maxSize: 1000
  expireAfterWrite: P1D
templateDeploymentFeature:
  enabled: true
  timeout:
      eachOperationRetryMillis: 500
      eachOperationRetryCount: 10
      allBlockWaitMillis: 5000
See more detailed Docker SDK documentation at Deploy iText DITO SDK.
Attach SDK Instance to Manager Deployment
It is possible to use SDK instances hosted elsewhere, however in some cases it is easier to attach an SDK instance to manager deployment. For that you can use the following script command:
kotlinc -script deploy-kubernetes-x.y.z.main.kts -- add-sdk --alias="dev" --config-path="path/to/folder/with/licenseFile/and/user.config" --output=dito-application-file.yaml
The --alias is used to differentiate multiple SDK instances. It will affect the service and is appended to sdk. So if you specify alias as dev you may reference it in Manager as http://sdkdev
The --config-path should be a path to the folder with license.json and configured user.config.yml
The --output should be a path to the application deployment file created by create-app-file sub-command.
Autoscaling SDK Instances
Kubernetes also allows the creation of horizontal autoscaling rules to add or remove additional SDK container copies as required in automatic mode. When creating SDK instances, it is possible to specify additional autoscaling options to add to the generated SDK deployment file:
|
|
--min-replicas - minimal number of replicas to exist,
--max-replicas - maximum number of replicas,
--cpu - limit for average CPU utilization percentage to calculate number of desired replicas.
Open the Manager Application for the First Time to Initialize it
Find the frontend service external address and open up the application at http://<external-ip> (default port is 80 but it's possible to override it with one of the parameters in service definition). You can get the external IP by executing the following command:
kubectl get -l app=frontend --all-namespaces service
Log in
Log into the application for the first time using the global administrator credentials you have passed in the environment configuration file (.env). After you have logged in, the workspace initialization will guide you through the process of setting up your workspace.
Choose a Name for Your Workspace
In the first step you choose a name for your workspace and select the time zone you are in. This time zone will be used for all creation and modification dates in the user interface. You can change these settings at any time in the settings area.
Upload License File
You will need a valid license file to use iText DITO Manager. Use the same license file you uploaded in the config folder of your SDK/API instance.
Specify the URL of the SDK/API Instance to Connect
In the instance connection wizard you have to specify the URL of the SDK/API instance you want to connect to the Manager.
In case this SDK/API instance is hosted outside of your Kubernetes environment, or has another namespace, just type the normal domain name / IP address and (optionally) port number where the SDK/API is exposed, e.g. http://sdk.domain.com:8080 or http://10.20.30.40 . Note that if you host your SDK/API via secure HTTPS protocol, you have to provide https:// schema accordingly.
In case you host your SDK/API instance at the same Kubernetes environment and namespace where DITO Manager is hosted, you can access SDK instance using http://<SDK_service>, where <SDK_service> is the name of the SDK service you created.
Stop, Update or Remove the Manager and Editor Applications
Stopping the Application
To temporarily stop the application, run the following command:
kotlinc -script deploy-kubernetes-x.y.z.main.kts -- stop
Warning! If an SDK instance was attached to the deployment file, this command won't have any effect on this SDK instance.
Starting the Application After it Has Been Stopped
kotlinc -script deploy-kubernetes-x.y.z.main.kts -- start
Warning! If an SDK instance was attached to the deployment file, this command won't have any effect on this SDK instance.
Updating the Application Version
Warning! Please make sure to back up your data (as well as data of the SDK/API instances that you set up) before performing an update.
Note! The containers will be recreated during application update. The data that is not persisted to Docker volumes will be lost.
Note! The application will be stopped and restarted during the update process.
kotlinc -script deploy-kubernetes-x.y.z.main.kts -- update
Warning! If an SDK instance was attached to the deployment file, this command won't have any effect on this SDK instance.
Undeploying/Removing the Application
To undeploy the application (stop it, remove the created Docker containers and networks), use the following operation:
Note: this operation is irreversible and might cause data loss! Data in containers that is not persisted by any volumes will be lost
kotlinc -script deploy-kubernetes-x.y.z.main.kts -- undeploy
Warning! If an SDK instance was attached to the deployment file, this command will have an effect on this SDK instance and will remove it as well.
Manual Deployment Instructions
We don't recommend using manual deployment instructions because it requires more effort compared to the script-based approach. Additionally, performing an application update sometimes requires modifying the application file or configuration file. This would be done automatically by the deployment script, while in manual cases you need to perform those steps yourselves.
Only use manual deployment instructions in cases where you have very strong reasons for not using the script-based approach.
Preparation
To get the application deployed it is required to create a template-manager.yml file with the following content. The example deploys the template manager application on one node and in a separate namespace to minimize network latency.
apiVersion: v1
kind: Namespace
metadata:
  name: itext
---
apiVersion: apps/v1
kind: Deployment
metadata:
  namespace: itext
  creationTimestamp: null
  labels:
    app: backend
  name: backend
spec:
  replicas: 1
  selector:
    matchLabels:
      app: backend
  strategy: {}
  template:
    metadata:
      creationTimestamp: null
      labels:
        app: backend
    spec:
	  containers:
	  - env:
	    - name: DITO_MANAGER_ACCESS_TOKEN_TIME_TO_LIVE
		  valueFrom:
			configMapKeyRef:
			  key: DITO_MANAGER_ACCESS_TOKEN_TIME_TO_LIVE
			  name: env
		- name: DITO_MANAGER_CORS_ALLOWED_METHODS
		  valueFrom:
			configMapKeyRef:
			  key: DITO_MANAGER_CORS_ALLOWED_METHODS
			  name: env
        - name: DITO_MANAGER_CORS_ALLOWED_ORIGINS
          valueFrom:
            configMapKeyRef:
              key: DITO_MANAGER_CORS_ALLOWED_ORIGINS
              name: env
        - name: DITO_MANAGER_CORS_ALLOWED_PATHS
          valueFrom:
            configMapKeyRef:
              key: DITO_MANAGER_CORS_ALLOWED_PATHS
              name: env
        - name: DITO_MANAGER_DATABASE_NAME
          valueFrom:
            configMapKeyRef:
              key: DITO_MANAGER_DATABASE_NAME
              name: env
        - name: DITO_MANAGER_DATABASE_PASSWORD
          valueFrom:
            configMapKeyRef:
              key: DITO_MANAGER_DATABASE_PASSWORD
              name: env
        - name: DITO_MANAGER_DATABASE_URL
          valueFrom:
            configMapKeyRef:
              key: DITO_MANAGER_DATABASE_URL
              name: env
        - name: DITO_MANAGER_DATABASE_USERNAME
          valueFrom:
            configMapKeyRef:
              key: DITO_MANAGER_DATABASE_USERNAME
              name: env
        - name: DITO_MANAGER_DEFAULT_ADMIN_EMAIL
          valueFrom:
            configMapKeyRef:
              key: DITO_MANAGER_DEFAULT_ADMIN_EMAIL
              name: env
        - name: DITO_MANAGER_DEFAULT_ADMIN_PASSWORD
          valueFrom:
            configMapKeyRef:
              key: DITO_MANAGER_DEFAULT_ADMIN_PASSWORD
              name: env
        - name: DITO_MANAGER_FRONTEND_APP_BASE_URL
          valueFrom:
            configMapKeyRef:
              key: DITO_MANAGER_FRONTEND_APP_BASE_URL
              name: env
        - name: DITO_MANAGER_JWT_PRIVATE_KEY
          valueFrom:
            configMapKeyRef:
              key: DITO_MANAGER_JWT_PRIVATE_KEY
              name: env
        - name: DITO_MANAGER_MAILING_ENABLE
          valueFrom:
            configMapKeyRef:
              key: DITO_MANAGER_MAILING_ENABLE
              name: env
        - name: DITO_MANAGER_MAXIMUM_FAILED_LOGIN_ATTEMPTS
          valueFrom:
            configMapKeyRef:
              key: DITO_MANAGER_MAXIMUM_FAILED_LOGIN_ATTEMPTS
              name: env
        - name: DITO_MANAGER_REFRESH_TOKEN_TIME_TO_LIVE
          valueFrom:
            configMapKeyRef:
              key: DITO_MANAGER_REFRESH_TOKEN_TIME_TO_LIVE
              name: env
        - name: DITO_MANAGER_SENTRY_DSN
          valueFrom:
            configMapKeyRef:
              key: DITO_MANAGER_SENTRY_DSN
              name: env
        - name: DITO_MANAGER_SENTRY_ENVIRONMENT
          valueFrom:
            configMapKeyRef:
              key: DITO_MANAGER_SENTRY_ENVIRONMENT
              name: env
        - name: DITO_MANAGER_SMTP_AUTH
          valueFrom:
            configMapKeyRef:
              key: DITO_MANAGER_SMTP_AUTH
              name: env
        - name: DITO_MANAGER_SMTP_FROM
          valueFrom:
            configMapKeyRef:
              key: DITO_MANAGER_SMTP_FROM
              name: env
        - name: DITO_MANAGER_SMTP_HOST
          valueFrom:
            configMapKeyRef:
              key: DITO_MANAGER_SMTP_HOST
              name: env
        - name: DITO_MANAGER_SMTP_PASSWORD
          valueFrom:
            configMapKeyRef:
              key: DITO_MANAGER_SMTP_PASSWORD
              name: env
        - name: DITO_MANAGER_SMTP_PORT
          valueFrom:
            configMapKeyRef:
              key: DITO_MANAGER_SMTP_PORT
              name: env
        - name: DITO_MANAGER_SMTP_TLS_ENABLE
          valueFrom:
            configMapKeyRef:
              key: DITO_MANAGER_SMTP_TLS_ENABLE
              name: env
        - name: DITO_MANAGER_SMTP_USERNAME
          valueFrom:
            configMapKeyRef:
              key: DITO_MANAGER_SMTP_USERNAME
              name: env
        - name: POSTGRES_DB
          valueFrom:
            configMapKeyRef:
              key: POSTGRES_DB
              name: env
        - name: POSTGRES_PASSWORD
          valueFrom:
            configMapKeyRef:
              key: POSTGRES_PASSWORD
              name: env
        - name: POSTGRES_USER
          valueFrom:
            configMapKeyRef:
              key: POSTGRES_USER
              name: env
        - name: SPRING_PROFILES_ACTIVE
          valueFrom:
            configMapKeyRef:
              key: SPRING_PROFILES_ACTIVE
              name: env
        image: itext/dito-manager-backend:{version}
        imagePullPolicy:
        name: dito-manager-backend
        resources: {}
      restartPolicy: Always
      volumes: null
---
apiVersion: v1
kind: Service
metadata:
  namespace: itext
  creationTimestamp: null
  labels:
    app: backend
  name: backend
spec:
  ports:
  - protocol: TCP
    port: 8080
    targetPort: 8080
    name: "8080"
  selector:
    app: backend
  type: ClusterIP
---
apiVersion: apps/v1
kind: Deployment
metadata:
  namespace: itext
  creationTimestamp: null
  labels:
    app: db
  name: db
spec:
  replicas: 1
  selector:
    matchLabels:
      app: db
  strategy:
    type: Recreate
  template:
    metadata:
      creationTimestamp: null
      labels:
        app: db
    spec:
      securityContext:
        runAsUser: 70
        runAsGroup: 70
        fsGroup: 70
      affinity:
        podAffinity:
          requiredDuringSchedulingIgnoredDuringExecution:
          - labelSelector:
              matchExpressions:
              - key: app
                operator: In
                values:
                - backend
            topologyKey: topology.kubernetes.io/zone
      containers:
      - env:
        - name: PGDATA
          valueFrom:
          configMapKeyRef:
            key: PGDATA
            name: env
        - name: POSTGRES_DB
          valueFrom:
            configMapKeyRef:
              key: POSTGRES_DB
              name: env
        - name: POSTGRES_PASSWORD
          valueFrom:
            configMapKeyRef:
              key: POSTGRES_PASSWORD
              name: env
        - name: POSTGRES_USER
          valueFrom:
            configMapKeyRef:
              key: POSTGRES_USER
              name: env
        image: itext/dito-manager-db:{version}
        imagePullPolicy:
        name: dito-manager-db
        resources: {}
        volumeMounts:
        - mountPath: /var/lib/postgresql/data
          subPath: pgdata
          name: dito-manager-db
      restartPolicy: Always
      volumes:
      - name: dito-manager-db
        persistentVolumeClaim:
          claimName: dito-manager-db
---
apiVersion: v1
kind: Service
metadata:
  namespace: itext
  creationTimestamp: null
  labels:
    app: db
  name: db
spec:
  ports:
  - protocol: TCP
    port: 5432
    targetPort: 5432
    name: "5432"
  selector:
    app: db
  type: ClusterIP
---
kind: PersistentVolumeClaim
apiVersion: v1
metadata:
  namespace: itext
  name: dito-manager-db
  labels:
    app: db
spec:
  storageClassName: "" # Specify correct storage class name to get automatic storage creation
  accessModes:
    - ReadWriteOnce
  resources:
    requests:
      storage: 10Gi
---
apiVersion: apps/v1
kind: Deployment
metadata:
  namespace: itext
  creationTimestamp: null
  labels:
    app: editor
  name: editor
spec:
  replicas: 1
  selector:
    matchLabels:
      app: editor
  strategy:
    type: Recreate
  template:
    metadata:
      creationTimestamp: null
      labels:
        app: editor
    spec:
      securityContext:
        runAsUser: 2000
        runAsGroup: 2000
        fsGroup: 2000
      affinity:
        podAffinity:
          requiredDuringSchedulingIgnoredDuringExecution:
          - labelSelector:
              matchExpressions:
              - key: app
                operator: In
                values:
                - backend
            topologyKey: topology.kubernetes.io/zone
      containers:
      - image: itext/dito-editor:{version}
        imagePullPolicy:
        name: dito-editor
        resources: {}
        volumeMounts:
        - mountPath: /var/opt/dito-editor
          name: dito-editor-data
      restartPolicy: Always
      volumes:
      - name: dito-editor-data
        persistentVolumeClaim:
          claimName: dito-editor-data
---
apiVersion: v1
kind: Service
metadata:
  namespace: itext
  creationTimestamp: null
  labels:
    app: editor
  name: editor
spec:
  ports:
  - protocol: TCP
    port: 8880
    targetPort: 8880
    name: "8880"
  - protocol: TCP
    port: 8881
    targetPort: 8881
    name: "8881"
  selector:
    app: editor
  type: ClusterIP
---
kind: PersistentVolumeClaim
apiVersion: v1
metadata:
  namespace: itext
  name: dito-editor-data
  labels:
    app: editor
spec:
  storageClassName: "" # Specify correct storage class name to get automatic storage creation
  accessModes:
    - ReadWriteOnce
  resources:
    requests:
      storage: 5Gi
---
apiVersion: apps/v1
kind: Deployment
metadata:
  namespace: itext
  creationTimestamp: null
  labels:
    app: frontend
  name: frontend
spec:
  replicas: 1
  selector:
    matchLabels:
      app: frontend
  strategy: {}
  template:
    metadata:
      creationTimestamp: null
      labels:
        app: frontend
    spec:
      affinity:
        podAffinity:
          requiredDuringSchedulingIgnoredDuringExecution:
          - labelSelector:
              matchExpressions:
              - key: app
                operator: In
                values:
                - backend
            topologyKey: topology.kubernetes.io/zone
      containers:
      - image: itext/dito-manager-frontend:{version}
        imagePullPolicy:
        name: dito-manager-frontend
        resources: {}
      restartPolicy: Always
      volumes: null
---
apiVersion: v1
kind: Service
metadata:
  namespace: itext
  creationTimestamp: null
  labels:
    app: frontend
  name: frontend
spec:
  ports:
  - protocol: TCP
    port: 80  # {external port} to connect the application
    targetPort: 8080
  selector:
    app: frontend
  type: LoadBalancer
---
apiVersion: v1
kind: ConfigMap
metadata:
  namespace: itext
  creationTimestamp: null
  labels:
    env: dito-manager
  name: env
data:
  SPRING_PROFILES_ACTIVE: "prod"
  DITO_MANAGER_JWT_PRIVATE_KEY: "..."   # ! Fill with Base64-encoded value of a random key. 256bit keys are recommended
  DITO_MANAGER_ACCESS_TOKEN_TIME_TO_LIVE: "86400"
  DITO_MANAGER_REFRESH_TOKEN_TIME_TO_LIVE: "1209600"
  DITO_MANAGER_MAXIMUM_FAILED_LOGIN_ATTEMPTS: "5"
  DITO_MANAGER_CORS_ALLOWED_PATHS: "*"
  DITO_MANAGER_CORS_ALLOWED_ORIGINS: "*"
  DITO_MANAGER_CORS_ALLOWED_METHODS: "*"
  DITO_MANAGER_DATABASE_URL: "db:5432"
  DITO_MANAGER_DATABASE_NAME: "dito"
  DITO_MANAGER_DATABASE_USERNAME: "postgres"
  DITO_MANAGER_DATABASE_PASSWORD: "1111"
  DITO_MANAGER_MAILING_ENABLE: "false"
  DITO_MANAGER_SMTP_HOST: "smtp.gmail.com"
  DITO_MANAGER_SMTP_PORT: "587"
  DITO_MANAGER_SMTP_USERNAME: "admin@gmail.com"
  DITO_MANAGER_SMTP_PASSWORD: "$uper$ecret"
  DITO_MANAGER_SMTP_FROM: "admin@email.com"
  DITO_MANAGER_SMTP_AUTH: "true"
  DITO_MANAGER_SMTP_TLS_ENABLE: "true"
  DITO_MANAGER_SENTRY_DSN: ""
  DITO_MANAGER_SENTRY_ENVIRONMENT: ""
  POSTGRES_DB: "dito"
  POSTGRES_USER: "postgres"
  POSTGRES_PASSWORD: "1111"
  DITO_MANAGER_DEFAULT_ADMIN_EMAIL: "admin@email.com"
  DITO_MANAGER_DEFAULT_ADMIN_PASSWORD: "admin@email.com"
  PGDATA: "/var/lib/postgresql/data/pgdata"
Customizing application settings
Common application settings
Initial User Credentials settings:

DITO_MANAGER_DEFAULT_ADMIN_EMAIL=admin@email.com - Initial user name
DITO_MANAGER_DEFAULT_ADMIN_PASSWORD=admin@email.com - Initial user password

General settings:

SPRING_PROFILES_ACTIVE - Used profile (Default=prod)


JWT access token settings:

DITO_MANAGER_JWT_PRIVATE_KEY - JWT private key

DITO_MANAGER_ACCESS_TOKEN_TIME_TO_LIVE - Access token time to live (Default=1800)

DITO_MANAGER_REFRESH_TOKEN_TIME_TO_LIVE - Refresh token time to live (Default=86400)

DITO_MANAGER_MAXIMUM_FAILED_LOGIN_ATTEMPTS - Maximum failed login attempts (Default=5)


CORS settings:

DITO_MANAGER_CORS_ALLOWED_PATHS - CORS allowed path (Default=/**)

DITO_MANAGER_CORS_ALLOWED_ORIGINS - CORS allowed origins (Default=*)

DITO_MANAGER_CORS_ALLOWED_METHODS - CORS allowed methods (Default=*)

Database settings:

DITO_MANAGER_DATABASE_URL=db:5432 - Used database URL and port (Default port=5432)

DITO_MANAGER_DATABASE_NAME - Database name

DITO_MANAGER_DATABASE_USERNAME - Database username

DITO_MANAGER_DATABASE_PASSWORD - Database password


Mailing system settings:

DITO_MANAGER_MAILING_ENABLE=true|false - Enable or disable mailing system (Default=true)

DITO_MANAGER_SMTP_HOST - SMTP server URL

DITO_MANAGER_SMTP_PORT - SMTP server port (Default=587)

DITO_MANAGER_SMTP_USERNAME - SMTP username

DITO_MANAGER_SMTP_PASSWORD - SMTP password

DITO_MANAGER_SMTP_AUTH - SMTP authentication requirement (Default=true)

DITO_MANAGER_SMTP_TLS_ENABLE - SMTP TLS requirement (Default=true)

DITO_MANAGER_SMTP_FROM - Sets custom FROM field for the outbound emails. Useful in case the DITO_MANAGER_SMTP_USERNAME parameter used for authentication is a technical/meaningless name, e.g. in case of AWS SES

Variables for the Sentry monitoring system (optional)

DITO_MANAGER_SENTRY_DSN - Sentry monitoring system SDK with client key configuration (DSN)

DITO_MANAGER_SENTRY_ENVIRONMENT - Variable to indicate current environment if this required.


Variables for the database application

POSTGRES_DB - Database name

POSTGRES_USER - Database username

POSTGRES_PASSWORD - Database password
Kubernetes-specific application settings
PGDATA - Database data directory
Running the application
To run the application it is required to run the following command in the folder which contains the described above template-manager.yml file:
kubectl apply -f .\template-manager.yml
To stop the application it is required to run the following command:
kubectl delete namespace itext
Manual SDK Deployment
Mount SDK/API Directories to Volumes
One more important aspect is SDK/API work directory data persistence. When an SDK/API instance is connected to a Manager deployment, the work directory contains currently deployed templates as well as service information about the connection to the Manager. Losing that information will cause data inconsistency between the Manager installation and the connected SDK/API instance(s), so it is very important to make sure the work directory persists when you restart your SDK/API instance for some reason. The work directory that contains data we need to persist is mounted at the /var/opt/dito path within the pod. Mounting the work directory to a volume makes sure the data is picked up when the container is restarted. To mount the work directory to a volume, use PersistentVolumeClaim section in your deployment. Also, if you want achieve an effective scaling of your SDK instance, you should create PersistentVolumeClaim with ReadWriteMany access mode. This will allow all pods to use the same volume and stay in a consistent state during re-scaling. Please note that while technically it's going to be an auto-scaled SDK group, the Manager is going to treat this group as if it was a single SDK instance.
The example describing SDK Instance deployment is listed below. You can save this content to sdk.yaml file and deploy it to your Kubernetes environment using the command kubectl apply -f sdk.yaml
apiVersion: v1
kind: Namespace
metadata:
    name: itext
---
apiVersion: apps/v1
kind: Deployment
metadata:
  creationTimestamp: null
  labels:
    app: sdk
  name: sdk
spec:
  replicas: 1
  selector:
    matchLabels:
      app: sdk
  strategy:
    type: Recreate
  template:
    metadata:
      namespace: itext
      creationTimestamp: null
      labels:
        app: sdk
    spec:
      securityContext:
        runAsUser: 2000
        runAsGroup: 2000
        fsGroup: 2000
      containers:
        - image: itext/dito-sdk:{version}
          imagePullPolicy: ""
          name: dito-sdk
          resources: {}
          volumeMounts:
          - mountPath: /etc/opt/dito/shared
            name: config
          - mountPath: /var/opt/dito
            name: storage
      restartPolicy: Always
      volumes:
      - name: config
        configMap:
          name: sdk-config
      - name: storage
        persistentVolumeClaim:
          claimName: dito-sdk-data
---
apiVersion: v1
kind: Service
metadata:
  namespace: itext
  creationTimestamp: null
  labels:
    app: sdk
  name: sdk
spec:
  ports:
  - protocol: TCP
    port: 8080 # Port for external access to the SDK
    targetPort: 8080
    name: "8080"
  selector:
    app: sdk
  type: LoadBalancer # could be changed to ClusterIP if you don't want external access
---
kind: PersistentVolumeClaim
apiVersion: v1
metadata:
  namespace: itext
  name: dito-sdk-data
  labels:
    app: sdk
spec:
  storageClassName: "" # Specify correct storage class name to get automatic storage creation
  resources:
    requests:
      storage: 5Gi
  accessModes:
    - ReadWriteOnce
---
apiVersion: v1
kind: ConfigMap
metadata:
  name: sdk-config
  namespace: itext
data:
  license.json: |
    # ! place here DITO License file content. Do not forget to add 4 spaces at the beginning of each new line
  user.config.yml: |
    pdfProducerReportCache:
      maxSize: 1000
      expireAfterWrite: "P1D"
    templateDeploymentFeature:
      enabled: true
      timeout:
        eachOperationRetryMillis: 500
        eachOperationRetryCount: 10
        allBlockWaitMillis: 5000